


Pazoma XXX Dual Big Sucker Air Cleaner Intake Filter Kit Installation instruction for M109R
Suzuki M109R XXX Dual Big Sucker Air Cleaner Intake Filter Kit Installation instruction
CAUTION! We Strongly recommend that a qualified technician install this kit If you do not completely understand the instructions prior to the install.
INSTRUCTIONS:
1. Remove seat, side covers & fuel tank per instructions in your factory service manual.
2. Starting from the left side, remove the two M6 button head Allen screws holding the factory air box to the motor. There is a spacer on the lower bolt. This will need to be re-used
3. Loosen hose clamp holding air cleaner chamber hose that runs to the factory air box. Remove this hose with |the airbox as a single unit. This will eave you with what is shown in Fig. 1.
4. With the factory air box off the bike, remove the five Phillips head screws on the back. These hold the chrome cover onto the airbox. They will not be re-used.
5. Inside the air box, there are 3 Phillips head screws holding the factory filter to the back of the box, Remove the filter and save the screws for re-use.
6. Remove the rubber elbow intake tube from the inside of the box. This will not be used.
7. Remove gasket from the factory air filter and install it into the groove in the back of the chrome intake adapter plate.
8. Using three of the 1/4-20x3/4" Mat head Allen screws, install 3 of the stand-offs into the front side of the adapter plate. They will be facing outward away from the bike. The flat head Allen screws have a counter-bore on the back of the plate where they sit flush. They mount as shown in Fig. 2.
9. Place chrome adapter plate onto the back half of the factory air box. Secure it to the airbox with three M5x12mm stainless screws. They go into the deep holes on the backside of the factory air box.
10. Flip the assembly over and insert the 3 screws you saved from step 4. These will also secure the adapter plate to the backside of the filter box. DO NOT OVERTIGHTEN!
11. Re-install the assembly onto the left side of the bike. Be sure to hook up the snorkel tube to the factory air cleaner chamber under the tank. Tighten all hose clamps.
12. Using three 1/4-20x3/4" flat head Allen screws and the black air filter cinch plate, install air filter on stand-offs. Torque to only 3-5 f/Ibs. (Fig. 3)
13. Place chrome mesh and chrome xXx cover onto the black cover and secure with the 1/4-20x1/2" polished stainless Tat head bolt.
14. On the right side, remove the two M6 button head screws that hold the factory air box to the engine. Loosen the hose clamp on the snorkel and remove the entire unit as one assembly.
15. Repeat steps 4 thru 13 on the right (exhaust) side of the bike.
16. Reassemble fuel tank, side covers, and seat per Factory Service Manual. You should be left with what is shown in Fig. 4.
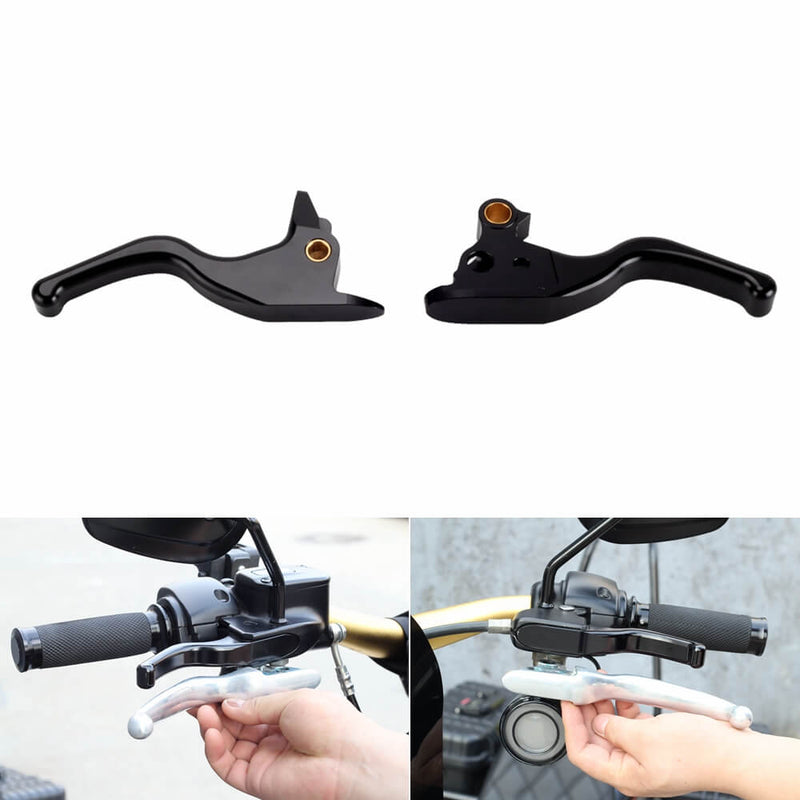
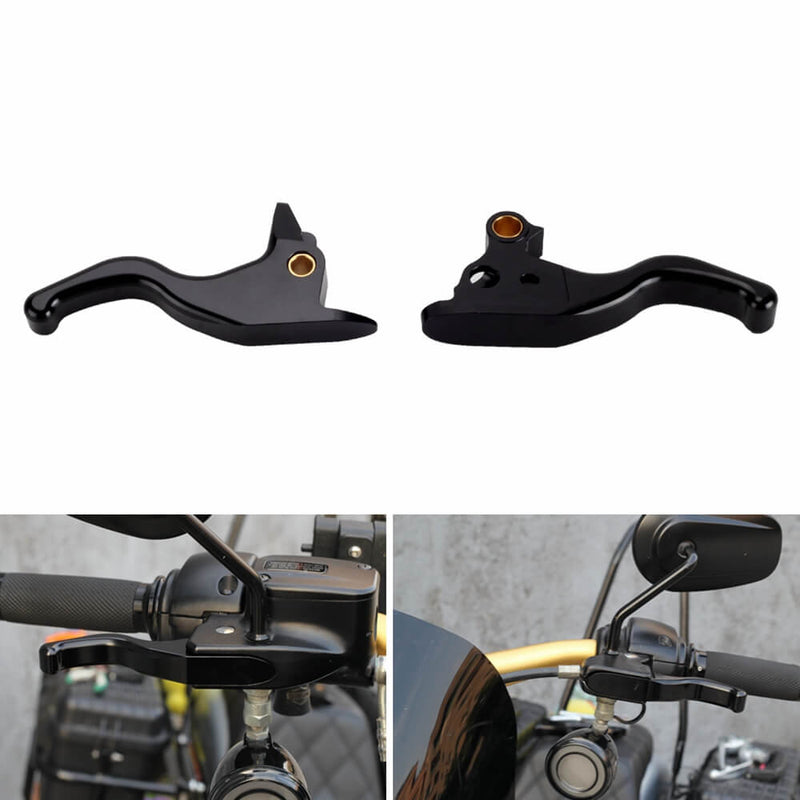
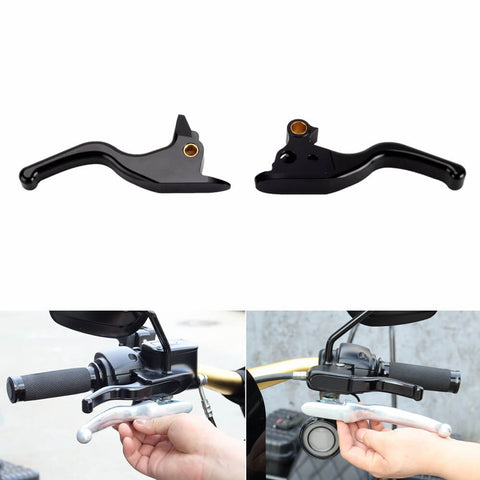
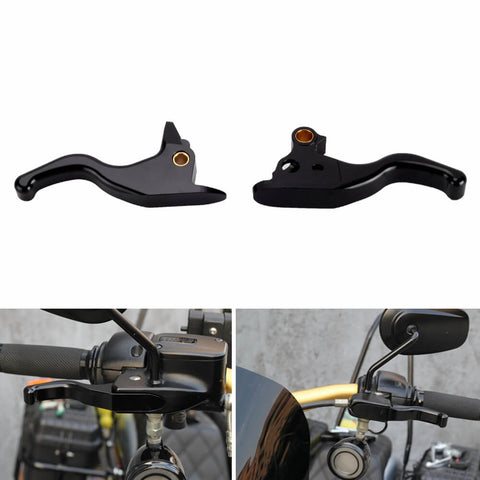
CNC Shorty Hand Control Lever Kit Brake Clutch Levers For Harley Softail Low Rider S Sport Glide Standard Street Bob 15-2024
CNC Edge Cut Hand Control Lever Kit Brake Clutch Levers Set For Harley Davidson Softail M8 2015-2024Features:CNC machining ensures the brake clutch fits perfectly with your motorcycle, making your motorcycle more fashionable, cool, and different.Anodizing and Chrome make brake clutch...
from $62.99

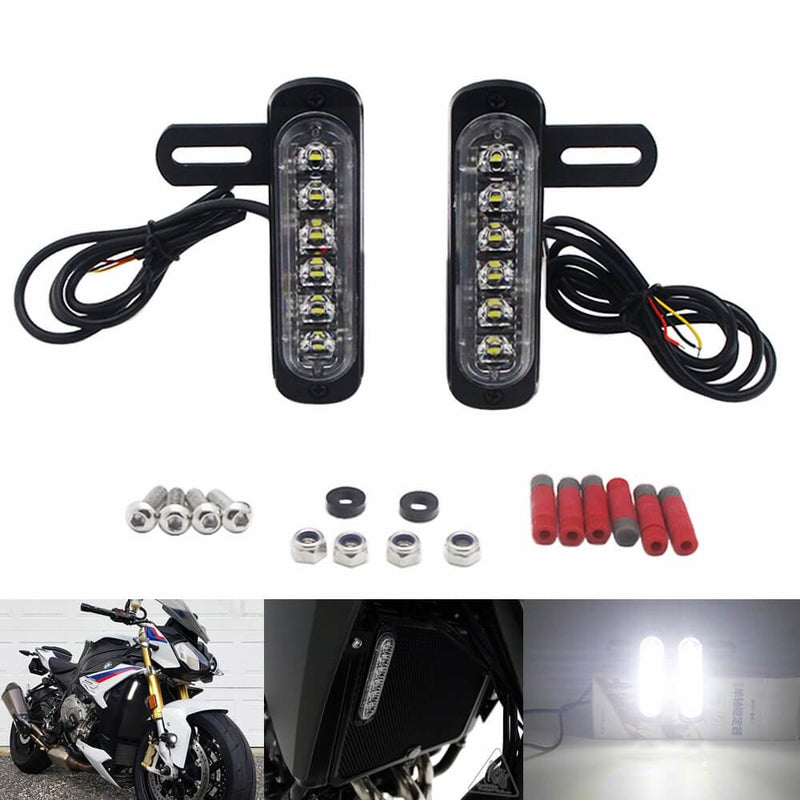
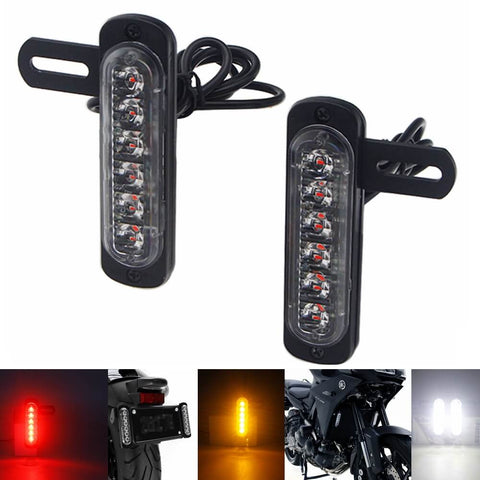
Motorcycle B6 Dual License Plate Auxiliary LED Taillight Burst Flash Brake light Daytime Running lights DRL Red or Yellow (Amber) or White
Motorcycle B6 Dual License Plate Auxiliary LED Taillight Burst Flash Brake light Daytime Running lights DRL Features:The B6 LED brake light was purpose-built to create the most amount of light from the most compact, low-profile housing possible. Six 1-watt Light...
$29.99
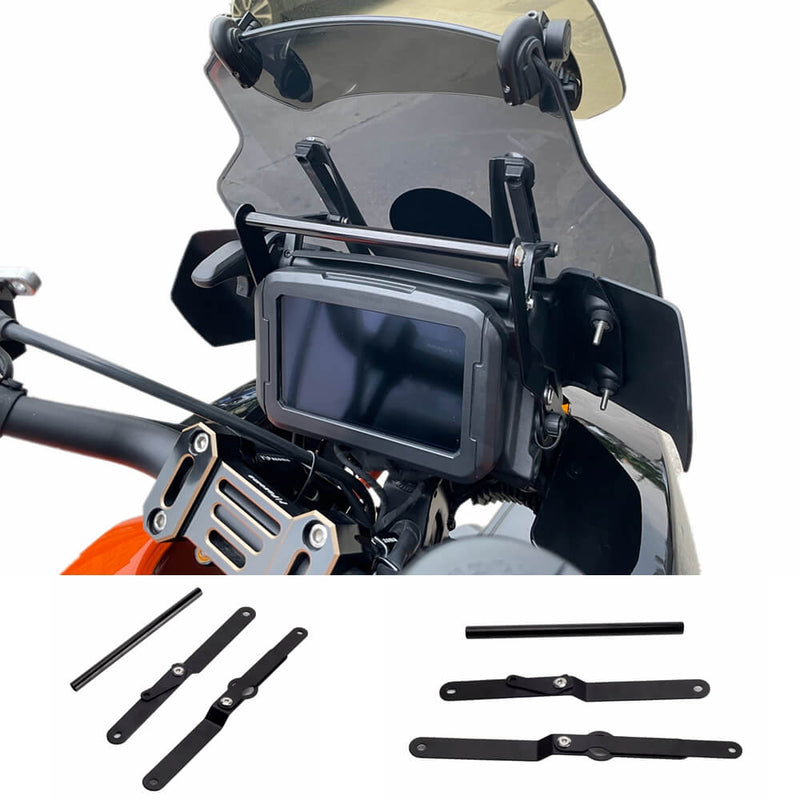
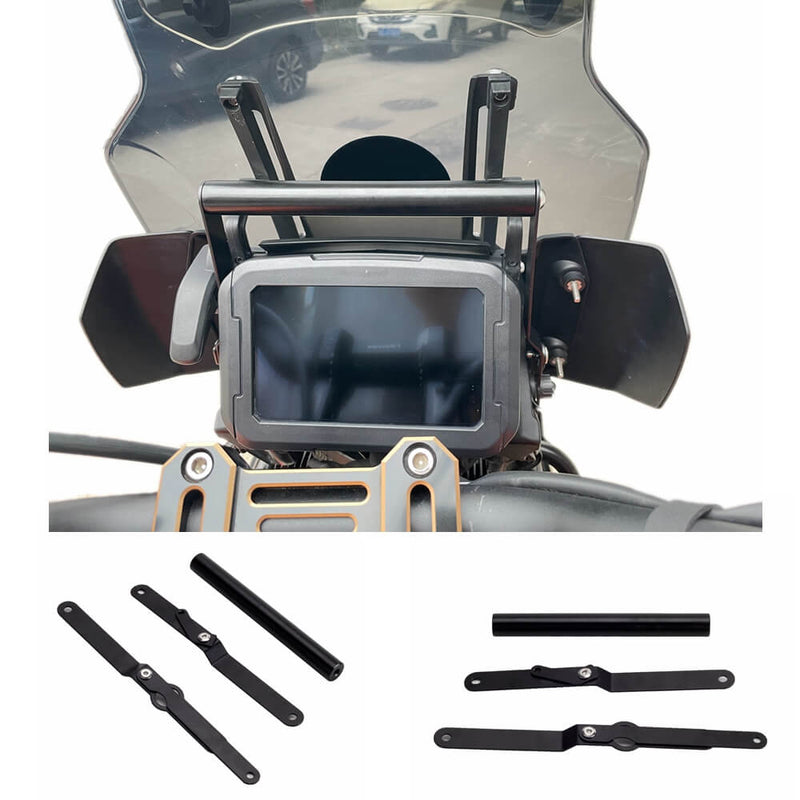
Phone GPS Mounting Adapter Bracket Crossbar Navigation Plate Navigator Support above instruments For Harley Pan America Special CVO RA1250 S SE
Phone GPS Mounting Adapter Bracket Crossbar Navigation Plate Navigator Support above instruments for Harley Pan America Special 1250 ST RA1250ST CVO RA1250S RA1250 RA1250SE 2021-2026Features:We have developed a stable mounting adapter made of Aluminum for all GPS handlebar mounts so...
from $33.99
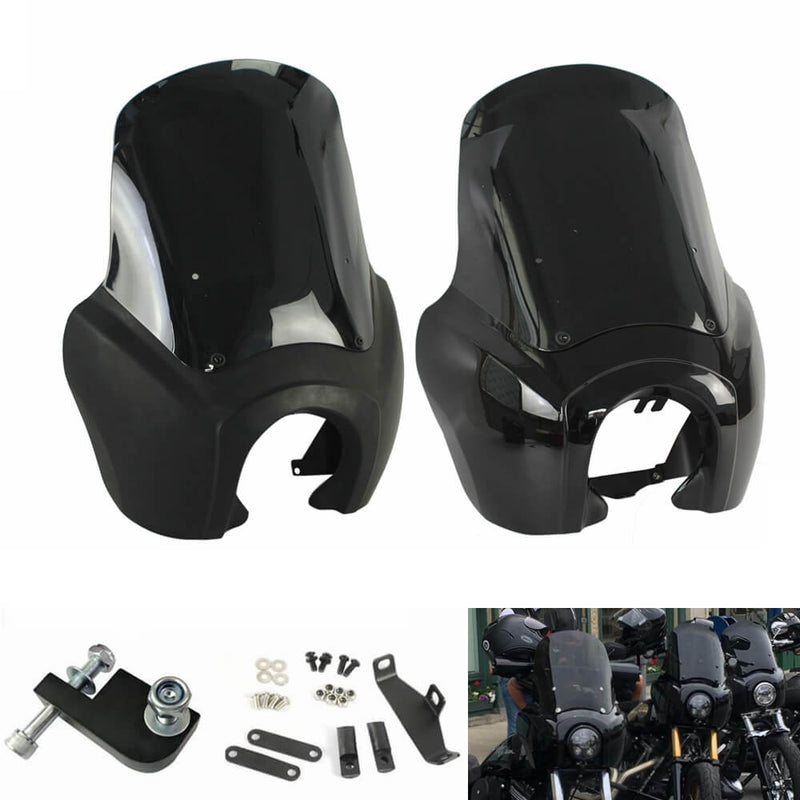

Harley Dyna Street Bob FXR Sportster T-Sport TSport Front Fairing Outer Club Style w/Black 15" Windscreen Windshield Headlight Relocation Block
$219.99
-
GB+BK
-
MB+BK
Harley Dyna Street Bob FXR Sportster T-Sport TSport Front Fairing Outer Club Style w/Black 15" Windscreen Windshield Headlight Relocation Block
Description:The Front Fairing with 15" windscreen that is adjustable and features a clean aerodynamic lip for airflow that goes over your head as you ride. Includes brackets on the back for mounting.Features:Aftermarket 100% brand newABS surface painted.Front fairing with 15"...
$219.99
-
GB+BK
-
MB+BK
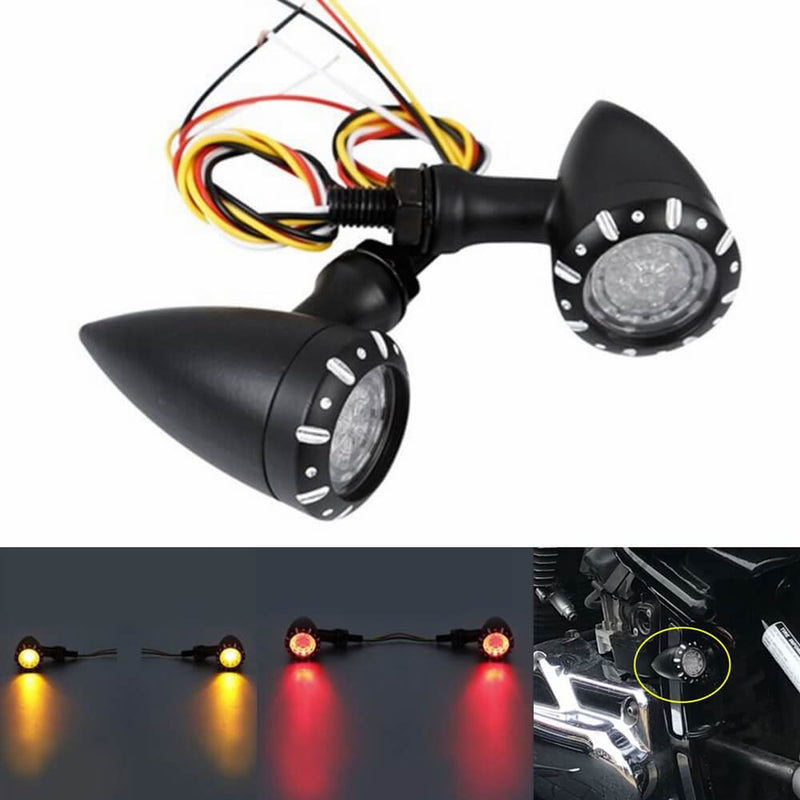
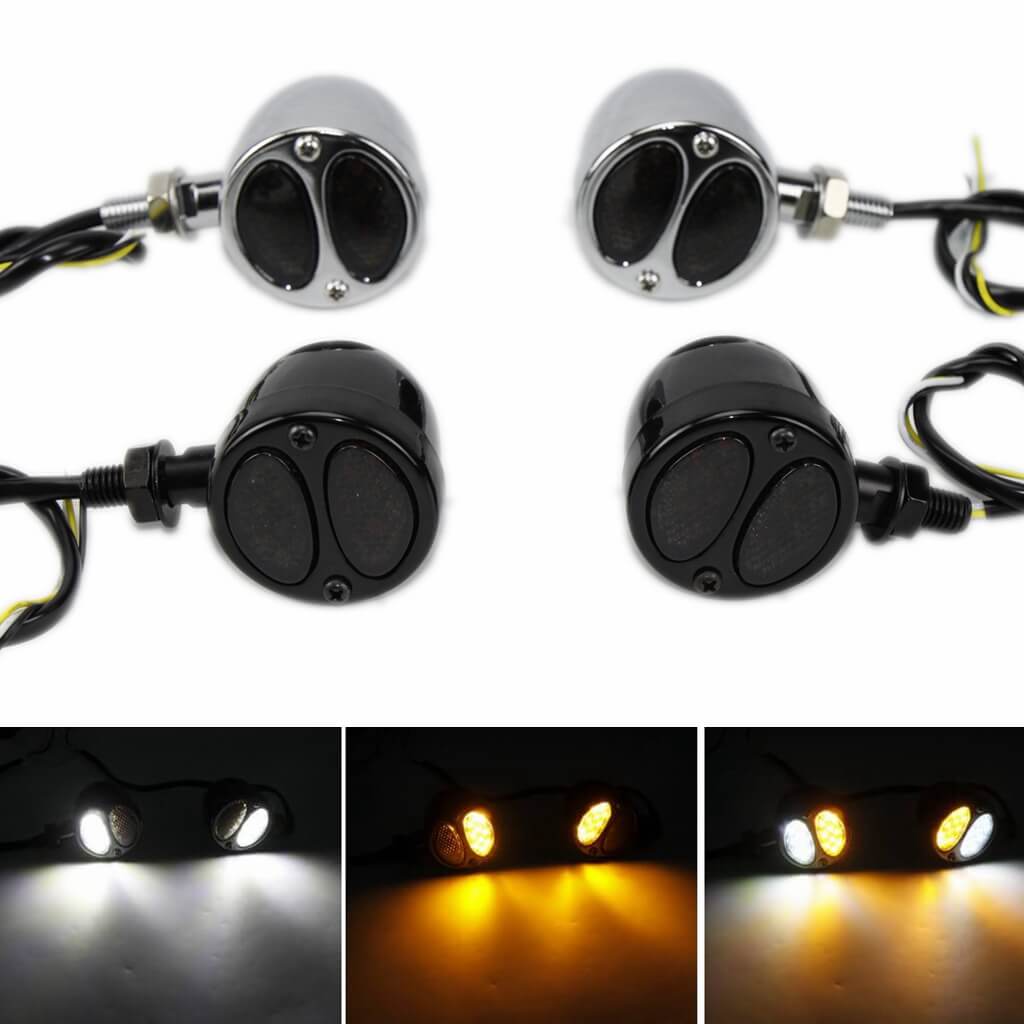
Motorcycle Universal 3 in 1 LED Turn Signals w/Tail Light Brake Blinker Turn Indicator Light Harley Chopper Bobber Cafe Racer Custom Cruisers
$29.99
-
Black
-
Chrome
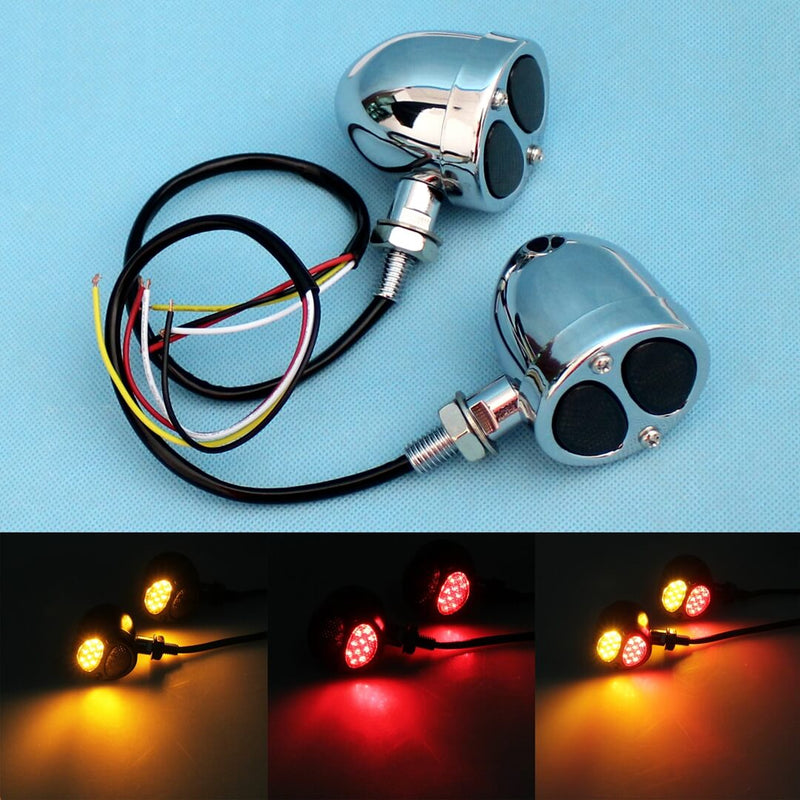
Motorcycle Universal 3 in 1 LED Turn Signals w/Tail Light Brake Blinker Turn Indicator Light Harley Chopper Bobber Cafe Racer Custom Cruisers
Motorcycle Universal 3 in 1 LED Turn Signals Tail Light Brake Light Unit Features:1. All-in-one unit - includes turn signal light 、running light 、brake light.2. It featured two light colors (red light +yellow) in a whole LED Light board when they...
$29.99
-
Black
-
Chrome
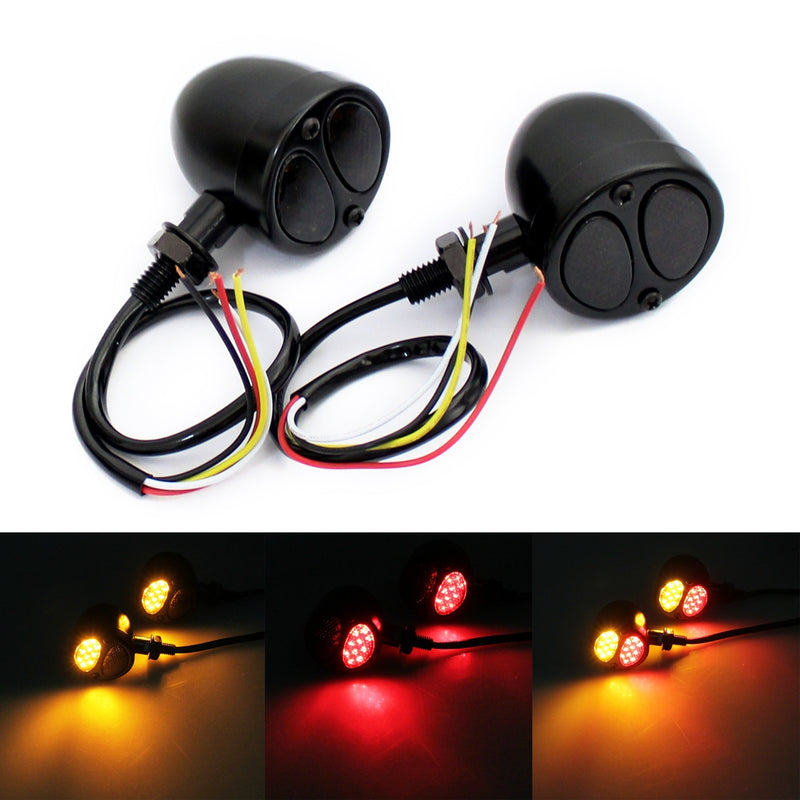
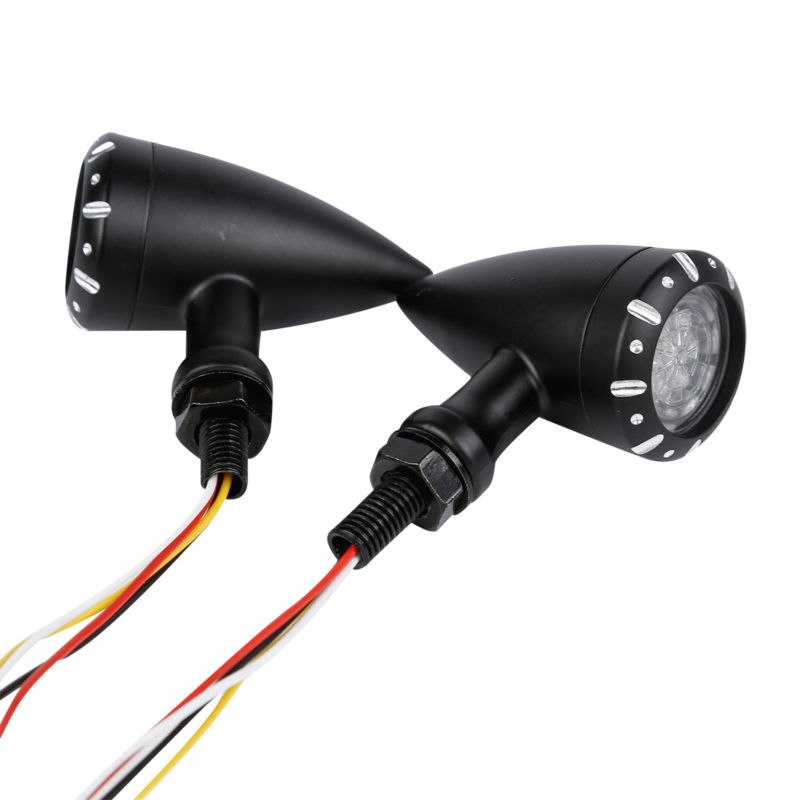
Motorcycle 3 in 1 LED Turn Signals w/ Brake Tail Light Blinkers Turn Indicator Lights Black For Harley Chopper Bobber Cafe Racer Chrome
3 in 1 LED - Turn Signals- Tail Light - Brake Light - Unit! Features: Long lasting, low power consumption, energy saving Each light with 20pcs Ultra Bright LED 10pcs Amber LED for Signals Light 10pcs Red LED for the...
$29.99
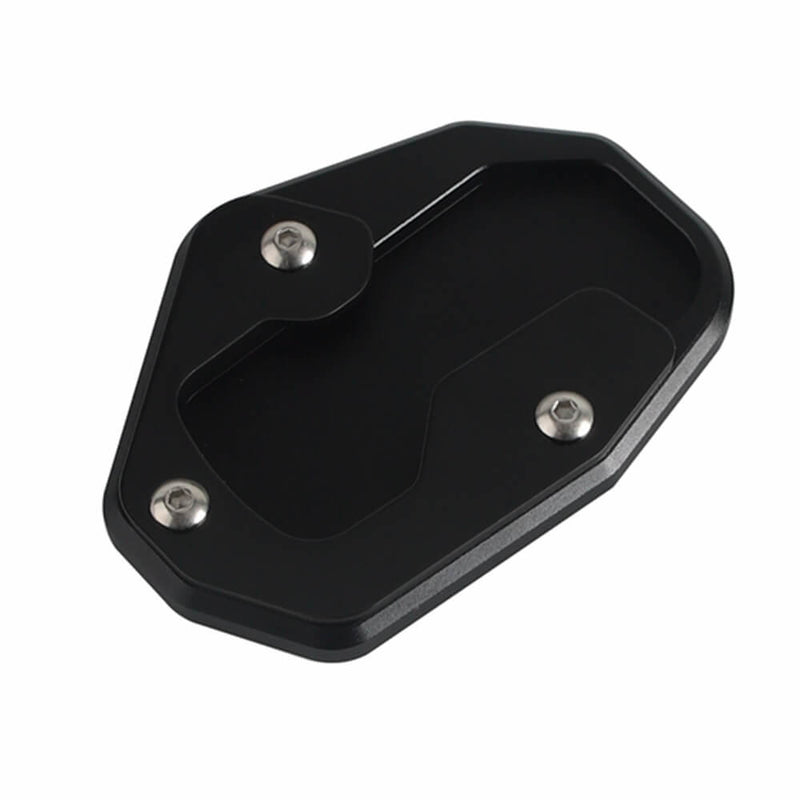
CNC Kickstand Side Stand Enlarge Extension Foot Pad Support For Harley Davidson Pan America 1250 Special RA1250S RA1250 2021-2024
$15.99
-
Black
-
Orange
-
Blue
-
Golden
- + 3
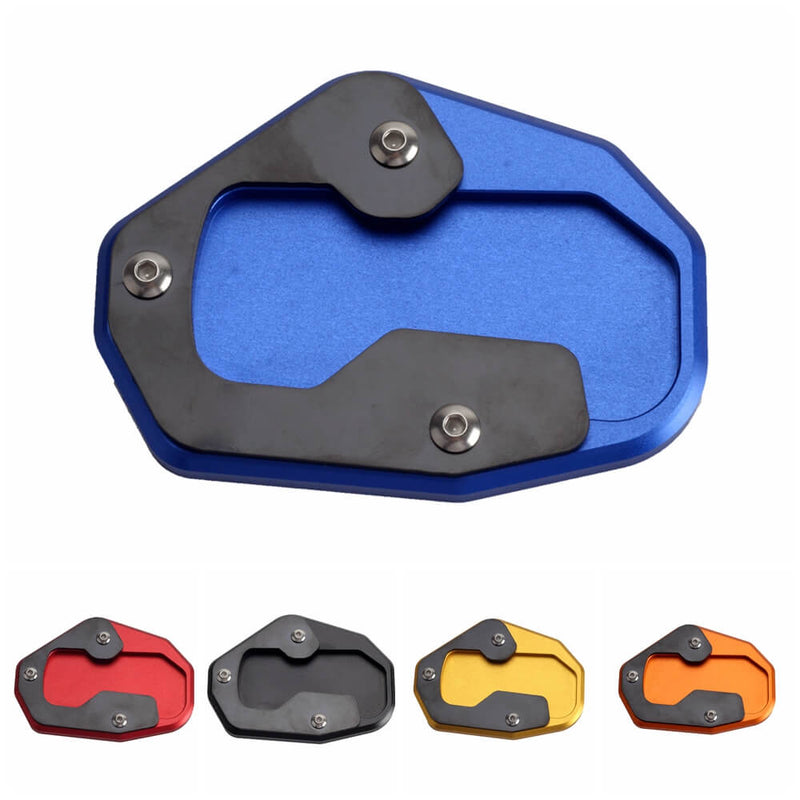
CNC Kickstand Side Stand Enlarge Extension Foot Pad Support For Harley Davidson Pan America 1250 Special RA1250S RA1250 2021-2024
CNC Kickstand Side Stand Enlarge Extension Foot Pad Support For Harley Davidson Pan America 1250 Special RA1250S RA1250 2021-2024Features:kickstand pad provides a larger surface area for your kickstand helps to park your motorcycle safely, reduces kickstand plate's scuffing on painted...
$15.99
-
Black
-
Orange
-
Blue
-
Golden
- + 3
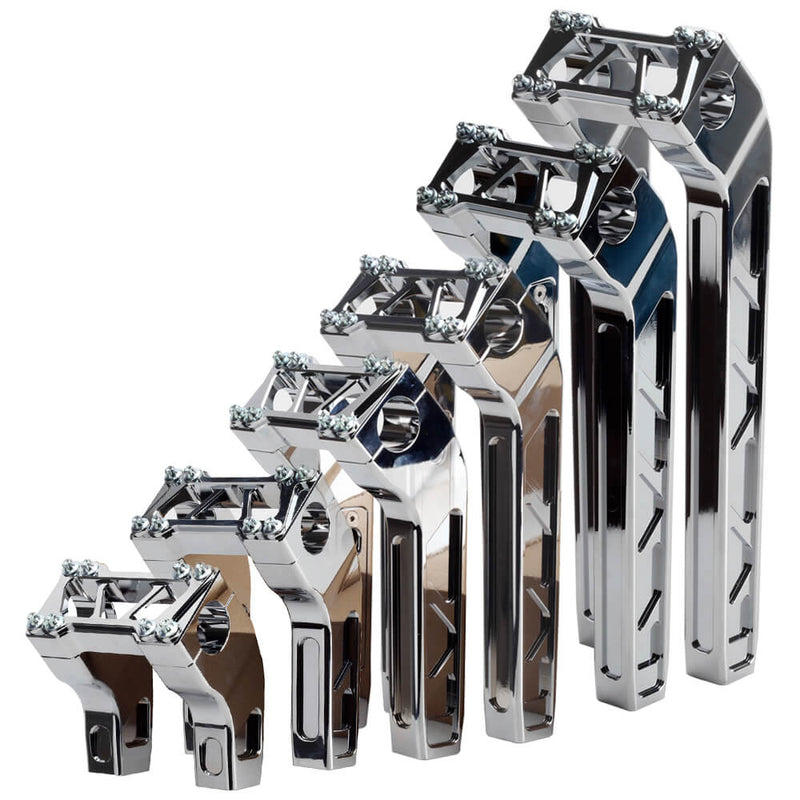
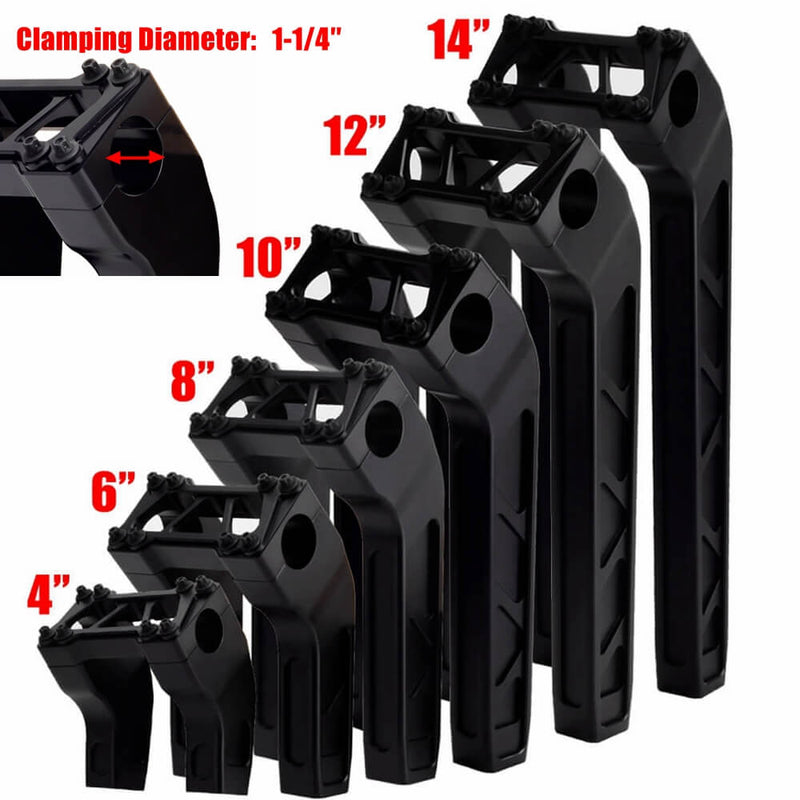
4" 6" 8" 10" 12" 14" Pullback Handlebar Risers Clamp For Harley 1.25" Tapered Fat Bars Softail Dyna Sportster Low Rider Fat Street Bob
from $109.99
-
Black
-
Chrome
4" 6" 8" 10" 12" 14" Pullback Handlebar Risers Clamp For Harley 1.25" Tapered Fat Bars Softail Dyna Sportster Low Rider Fat Street Bob
Pullback Style Modular Handlebar Risers Kit for Harley Dyna / Street bob / Softail / SportsterFeature:Brand New Pazoma X-series Club Style 1.5" Pullback Handlebar Risers.The Series Modular Risers are designed for high performance, good looks, and ease of installation.These risers...
from $109.99
-
Black
-
Chrome